The Best Mobility Exercises For CrossFit Athletes
Did you know that mobility always comes before stability and strength, no matter what kind of training you are doing? As a Physical Therapist and Fitness Coach for the last ten years, I have seen firsthand why this is so true and today, I will share game-changing mobility exercises for CrossFit with you so you can maximize your potential as a CrossFitter.
CrossFit is a demanding training methodology, and the WODs (workouts of the day) you do daily can physically take a toll on you. Your CrossFit performance and ability to edge out your competitors also depends on preserving energy rep to rep so that you can maintain the pace you are moving at, hopefully finishing first in the workout.
This is where your mobility steps in as a critical factor. Having optimal mobility and a full range of motion in the most essential joints is paramount in training so that you can disperse the forces on your joints evenly and appropriately and avoid excessive joint wear and tear. But, also avoid leaking energy through poor movement that drops your pace over time due to fatigue.
Imagine a day when you have built up a full range of motion in all of the most important joints of your body, and the exercises in your workouts become effortless, you sustain fewer injuries, and your CrossFit performance skyrockets to your full potential.
The mobility exercises I’ll review in this blog will help you do that. You’ll be able to move better, feel stronger, and keep training hard without the need for endless hours stretching, just like my clients inside my 1:1 Pain-Free Performance Program, who have eliminated their aches and pains without having to miss the gym to rest or turn their workouts into rehab sessions.
Let’s get started so you can mobilize the most critical joints and enhance the quality of your movements with simple adjustments to your daily routine. We’ll target the most essential areas, from your tight hips to improving shoulder mobility and correcting bad positions in your overhead lifts that can have full-body ramifications.
What are the best mobility exercises for CrossFit?
Practical mobility training continues beyond static stretches and flexibility. It is about building your joint control and accessing a full range of motion passively and actively, where you move the joint without an external force like a training partner, band, or foam roller.
Stretching has a ton of benefits. However, it is likely only to enhance the range of motion in the short term and provide less than stellar effectiveness in decreasing the risk of injury.
By incorporating these mobility exercises into your daily routine that focuses on a more active approach, you can not only build your body’s resilience and performance but also maintain these improvements in mobility for a more extended period.
Shoulder Mobility Exercises
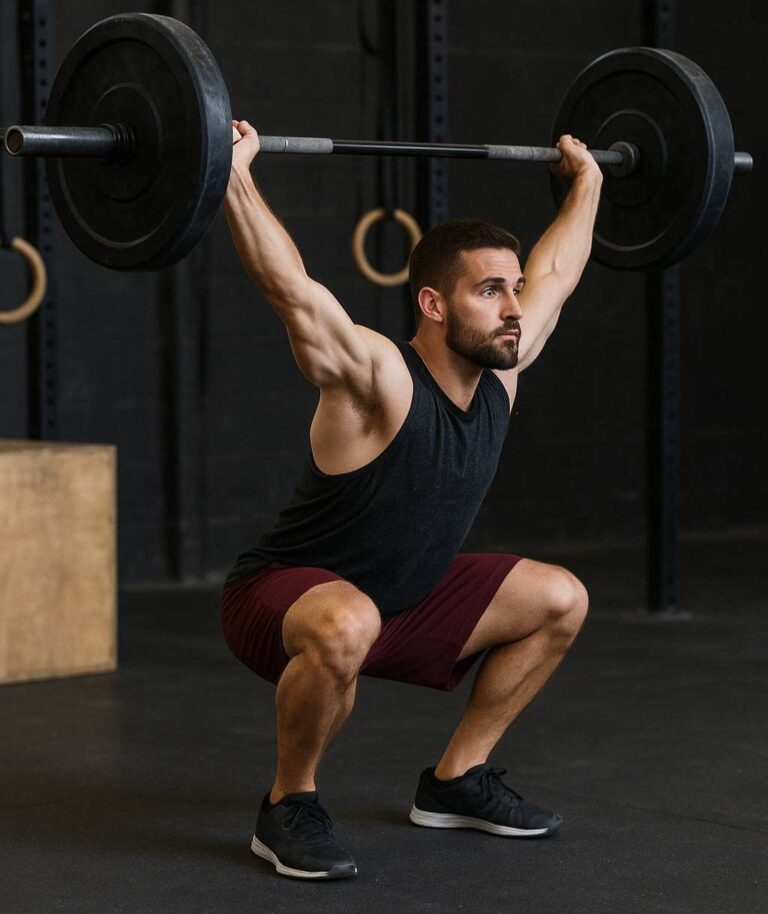
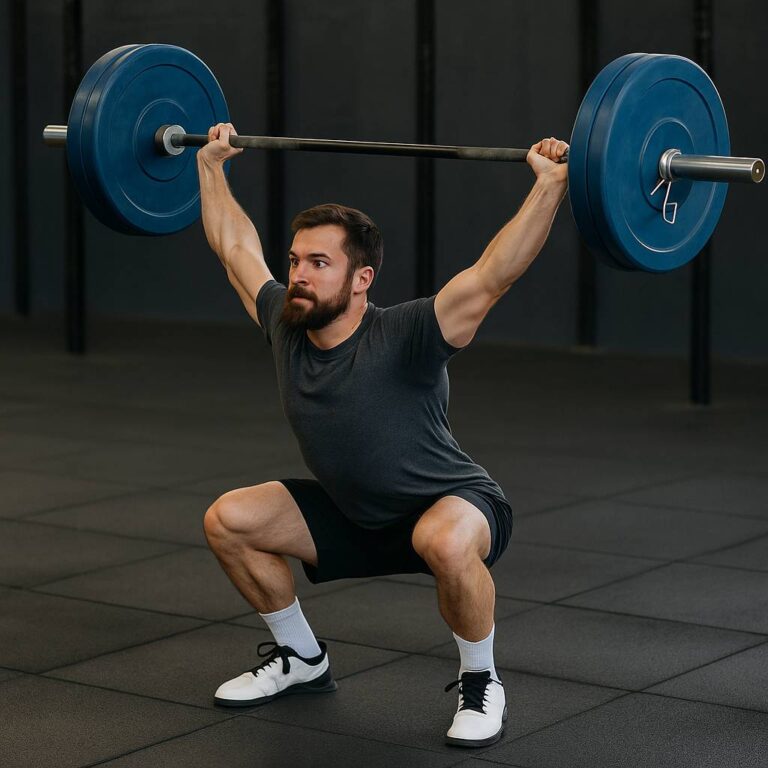
The shoulder joint and shoulder blades are critical in many CrossFit movements. Most notably the overhead squat and overhead lifts. So much so that when I am designing training and mobility programs for my clients inside my 1:1 Pain-Free Performance Program, I make it a point to have one day throughout the week where the shoulder is not involved so that I can manage how much load the shoulders are taking on day to day.
A shoulder complex that functions well from a mobility standpoint is critical to healthy shoulders and can help you handle heavy loads in your training to avoid pain and injury. My favorite shoulder mobility exercises to do so are below.
Shoulder Controlled Articular Rotations
Scapular Controlled Articular Rotations
Active Bar Hang
Thoracic Spine Mobility Exercises
Thoracic spine mobility is one of the most overlooked areas in functional fitness. Having a mobile upper back is so vital for any movement that takes place with the upper body. In fact, as a Physical Therapist, I consider thoracic spine mobility to take precedence over any other joint in the upper body. It is that important. If the spine cannot move, the other joints extending to the limbs will have to compensate.
Adding these exercises into your training program will be a great way to avoid these compensations during various CrossFit training exercises and assist in posture both inside and outside of the gym.
Thoracic Controlled Articular Rotation
Cat-Cow
Open Book Rotations
Lumbar Spine Mobility Exercises
Lower back mobility has a special place in my heart after sustaining my fair share of lower back injuries in the past. Before developing the principles and tactics I now use in my training and clients’ training, I frequently injured my lower back and was sidelined trying to rehab it back to its full potential.
Back pain and its root cause are multifactorial; however, addressing lower back mobility is a crucial first step in decreasing the prevalence of low back pain among CrossFit athletes. Developing a strong core, resilient posterior chain, and mobility throughout your system will be your best defense against low back injuries so you can continue to improve your CrossFit performance.
Adding these low-back mobility drills to your training sessions can help keep the low back moving well and training hard daily.
Lumbar Flexion PAIL/RAIL
Loaded Lumbar Cat-Cow
Prone Scorpion
Hip Mobility Exercises
Like the shoulder joint, having optimal hip joint mobility will be a cornerstone in your CrossFit performance because of how frequently it is involved in CrossFit movements. The hip joint has one of the largest available ranges of motion of all joints in the body. Having hips that function well is vital for building a deeper squat, avoiding compensations during deadlifts, allowing you to run faster and further, and much more.
Tight hips and restricted hip flexors can hinder you from executing the most essential exercises in CrossFit, like cleans, overhead squats, and pistol squats, and can lead to compensations up and down the chain. Incorporating these hip mobility exercises can expand your range of motion and improve your performance.
Hip 90 / 90 Rotations
Hip Extension PAIL / RAIL
Quadruped Hip Controlled Articular Rotation
Ankle Mobility Exercises
The foot and ankle are your connection to the ground, and having ankles that don’t move how they are supposed to can be detrimental to almost any movement you want to perform for the lower body.
I have touched on the joint-by-joint approach that categorizes the body’s joints as stable or mobile—alternating as you move up the chain from the floor. If a joint is stable, it needs to be able to resist movement so that the mobile joints can move.
For instance, the foot is a stable joint, while the ankle is mobile. As you move into a deep squat position, for example, the foot must become rigid to move the ankle. But, when the ankle cannot move due to tightness, it steels motion from the knees, which is not ideal and can increase the risk of injury.
By incorporating these exercises into your training, you can increase the mobility of your ankles and avoid compensations at the joints above them.
Banded Ankle Dorsiflexion Distraction
Ankle Controlled Articular Rotation
Ankle Dorsiflexion PAIL/RAIL
How to test your mobility
The first step to any training program is assessing how you move and your mobility across the entire body. A mobility test serves as a guiding light and provides insight into tight areas and parts of your body that need attention to optimize injury prevention in the gym.
By utilizing a movement screen like the one I have my clients perform before starting their 1:1 Pain-Free Performance Program, I can get a bird ‘ s-eye view of how they move so that their training program meets them where they are and progresses as they do.
The movement screen below is the nine movements I will prescribe on day one of my client’s training program. It is a blend of mobility assessment and core strength endurance testing. You’ll notice that none of these are stretching tests. They are all considered active range of motion tests since that is your ultimate goal in training.
The WillPower Strength & Nutrition Movement Screen
Scratch Test
The Scratch Test is a simple assessment focusing on shoulder joint mobility and the range of motion in your shoulder blades. To perform this test, raise your right arm overhead and bend your elbow, allowing your hand to reach down the center of your upper back. Simultaneously, take your left arm behind your back, attempting to reach up and touch your right hand.
The goal is to reach both hands toward each other, with the right hand trying to touch the middle of the upper back and the left hand reaching upward, aiming to touch or overlap fingers. This test evaluates the mobility and flexibility of the shoulders and shoulder blades, providing insights into any discrepancies between the two sides.
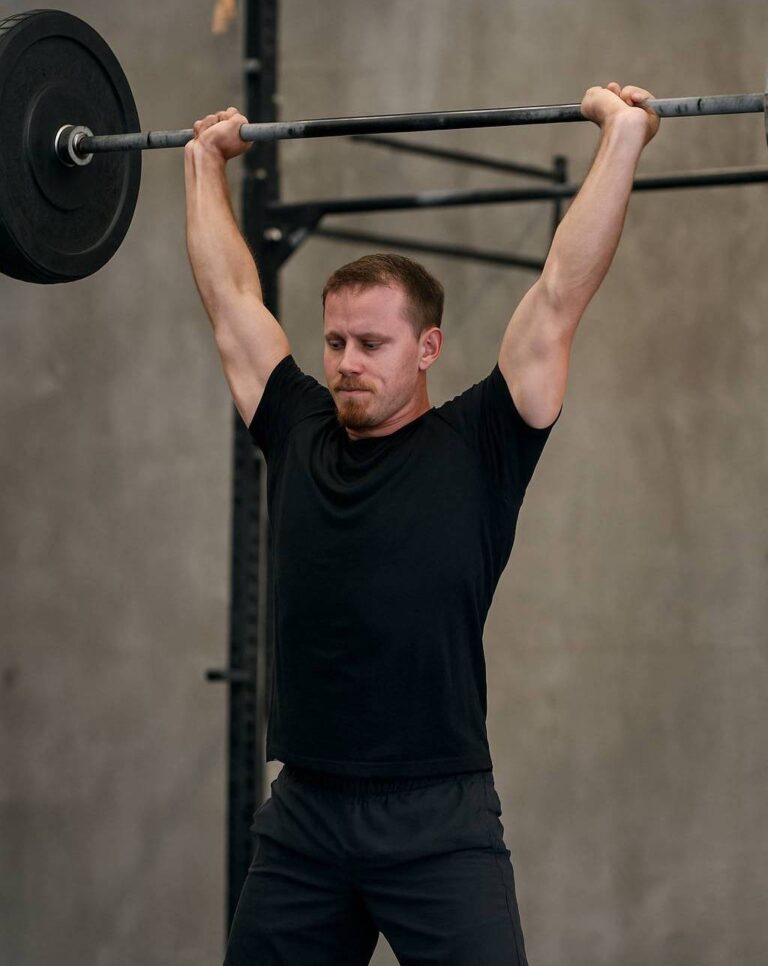
Overhead Air Squat
The Overhead Squat test is a valuable assessment focusing on assessing your ability to squat while maintaining an upright position with your arms extended overhead. To perform this test, stand with your feet shoulder-width apart, arms fully extended overhead, and holding a dowel or a barbell. Initiate the squat by bending your knees and hips to squat down as low as possible while keeping your arms straight overhead.
The goal is to maintain a good range of motion in both the squat and the overhead positions without leaning excessively forward or letting the arms fall forward. This test provides insights into your overall flexibility, mobility, and lower body and shoulders stability.
Toe Touch
The Toe Touch test is a simple yet insightful assessment focusing on the flexibility and mobility of your posterior chain. To perform this test, stand tall with your feet together and slowly bend forward from your hips, aiming to touch your toes without bending your knees. This test assesses the flexibility of your lower back, hamstrings, and the entire posterior chain.
The inability to touch your toes might indicate limited flexibility, which can correlate with a higher risk of lower back pain and potential injuries, mainly when performing exercises like deadlifts from the floor. It is a valuable indicator suggesting additional focus on flexibility and mobility in the posterior chain.
Split Squat
The Split Squat test also called the Inline Lunge test, evaluates hip mobility and lower body stability. To perform this test, start in a split stance with one foot in front of the other, maintaining balance. Bend both knees, lowering your body toward the ground until the back knee gently touches or hovers just above the ground.
Ensure the front knee stays aligned with the foot, avoiding inward collapse. Switch sides and perform the same movement with the opposite leg forward. This test assesses hip mobility and evaluates ankle and hip stability. It’s also an indicator of hip and quad strength, judging by how controlled the knee touches the ground and rises without losing balance or leading movement with the hips.
Single Leg Active Straight Leg Raise
The Single Leg Active Straight Leg Raise test assesses the flexibility of the posterior chain while removing weight-bearing demands. To perform this test, lie on your back with one leg straight and the other bent at the knee. Keeping the non-testing leg straight, lift it off the ground as high as possible without bending the knee. The aim is to pass the ankle bone (malleolus) beyond the midline of the thigh (femur) while keeping the leg straight.
This test evaluates the flexibility of the posterior chain in a non-weight-bearing position, offering insights into potential limitations without the postural demands that might restrict the range of motion due to core instability.
Front Leaning Rest
The Front Leaning Rest test, commonly known as the plank, assesses core muscles’ strength and stability. To perform this test, assume a push-up position, resting on your forearms and toes, forming a straight line from head to heels, engaging your core muscles. While not directly a mobility test, the core’s significance lies in its connection to overall movement.
According to the core-to-extremity principle, a strong core supports limb mobility. Weakness or instability in the core can limit mobility in the arms and legs, making the core’s role pivotal in preventing injuries, especially when lifting heavy weights or performing dynamic movements.
Reverse Plank
To perform the Reverse Plank test, sit on the floor with legs extended in front, placing hands behind the body with fingers pointing toward the feet. Lift the hips off the ground, forming a straight line from head to heels, engaging the posterior chain and shoulder blades. This test assesses posterior chain endurance, including retracting the shoulder blades and extending the shoulder joint.
Insufficient endurance in the posterior chain muscles might compromise technique during high-repetition Olympic lifts, leading to poor positions and increased risk of injury. Mastering this test reinforces the importance of posterior chain strength and stability for maintaining proper form in dynamic movements.
Side Plank
The Side Plank test is executed by lying on one side with legs extended and supporting the body weight on the forearm, forming a straight line from head to heels. Engage the core muscles and lift the hips off the ground, maintaining alignment.
This test assesses oblique strength and lateral hip stability. The endurance of lateral trunk and hip muscles evaluated in this test is crucial for maintaining core stability under heavy weights during CrossFit training, reducing the risk of injuries and enhancing overall performance.
What is the difference between mobility and flexibility?
To this point, I have talked frequently about mobility and how limited mobility can negatively affect your CrossFit performance. However, in my experience as a physical therapist and fitness coach, many genuinely need to understand the differences between these metrics.
Both are important and complementary; ideally, they should be equal for every joint throughout the body. However, this is seldom the case, as some CrossFit athletes are flexible but cannot use their available range. At the same time, some are not flexible but are strong within a limited range.
As we dive into the difference between mobility and flexibility, we must note that optimal mobility is based on your function and what you need it for. For example, if you want to compete in CrossFit, you need just enough mobility to avoid no reps and be stable in the necessary positions. But, if you were to change to a ballet, your mobility requirements would change drastically and need to be expanded to suit the needs of a ballet dancer.
Expanding the range of motion in and of itself is not something I prescribe to, as once you are “mobile enough”, time and resources in training can be spent elsewhere to continue improving your performance. At the same time, you work to sustain the mobility you have built.
Mobility
Mobility is the ability to move a joint through a full range of motion under your control or actively. Also known as active range of motion, it is the gold standard for mobility training and is what you are trying to expand over time.
Building better mobility is predicated on your brain’s ability to perceive a range of motion as “safe.” If your brain and nervous system sense that a joint or group of muscles is weak or unstable at a specific range of motion, it will lock the joint down, and you will perceive it as tight.
This is common in CrossFitters who consistently need to stretch before training to regain access to their joint range but ultimately return to baseline the next day.
The best way to expand your mobility is to continuously operate within your available range and build stability at the end of your range of motion to increase the movement available to you at a joint slowly.
Flexibility
There are different kinds of flexibility training, including static and dynamic stretching. Dynamic stretching is typically used before training to shake off normal stiffness from a prior training day. Whereas static stretching usually has the intent of improving your flexibility.
Flexibility pertains to your joints and muscles’ ability to move through a range of motion passively or under an external force’s control. This could be through the use of a stretching tool, another body part, or a training partner. This can assist in building your passive range of motion, which is a prerequisite for an active range of motion.
But the caveat here is that stretching is not required to build a passive range of motion since you can achieve it through consistent mobility training. Also, endless stretching and large amounts of passive range of motion without stability or strength won’t serve you as a CrossFitter since strength at your end range is necessary for lifting heavy loads. However, a benefit of stretching is that it can create a window of opportunity for strengthening in a new range of motion.
For example, a brief drop in tightness occurs when you perform a stretch such as the Samson stretch for tight hip flexors. This window is fleeting, but for better long-term results, you can perform strengthening or even loaded stretches within this new range to be more likely to access this range later on.
FAQ
When to do mobility exercises?
Mobility drills can be done anytime but are best after the body is warm. If you do them before training, start with an easy bike, jog, or row to improve core temperature. I also like to pair mobility drills with main movements for the day, such as pairing warm-up sets of back squats with hip rotation drills.
Does stretching prevent injuries?
The research suggests that stretching does not prevent injuries. But, optimizing your joint range and stability can give you the best chance at mitigating unnecessary forces on joints in training. The best prevention for injuries is monitoring how much work you do in the gym and progressing slowly over time.
What are mobility flow workouts?
Mobility flow workouts are a great way to work on your mobility in a less monotonous way. Select the mobility exercises you wish to complete, pair them together, and set a clock. Then, cycle through these exercises with little to no rest while maintaining an easy pace. This is also a great way to structure your active recovery between training sessions, as it helps move blood around the body.
The Wrap-Up On CrossFit Mobility Exercises!
As a Physical Therapist and Fitness Coach, I’ve witnessed the game-changing impact of prioritizing mobility in CrossFit training over my ten years of experience. These practical mobility exercises for CrossFit aren’t just theory but tools to elevate your CrossFit performance.
Incorporating these drills, targeting shoulders, thoracic spine, lower back, hips, and ankles, will enhance your movement quality and overall performance. Remember, mobility isn’t solely about flexibility; it’s active joint control, crucial for preventing injuries and boosting long-term performance.
My goal is for this article and movement screen to serve as guides to assess and improve your mobility, paving the way for enhanced workouts and reduced injury risks.
My clients have transformed their training through my 1:1 Pain-Free Performance Program, eliminating aches and pains without sacrificing gym time. If you are ready to do the same, I can help!
Please take advantage of your free consultation to learn how my program can help you elevate your CrossFit performance and train without pain.