How To Get Your First Handstand Push Up In CrossFit
The handstand push-up is a major skill in gymnastics and CrossFit and a hallmark of upper body strength, control, and athleticism. (1)
Handstand push-ups challenge your entire body in ways other movements cannot.
They demand shoulder stability, a strong core, and control over your body weight in a vertical plane.
This makes them a true test of your functional fitness and an essential gymnastics movement in the CrossFit repertoire.
Beyond the physical benefits, there’s something uniquely empowering about being able to push yourself up while inverted.
However, the road to your first handstand push-up isn’t about brute strength or endless practice.
It’s about following a structured, progressive approach that builds the necessary strength, mobility, and technical knowledge step by step.
Whether you’re a complete beginner or someone refining their skills, this four-step guide will provide you with the best methods to develop your handstand push-up safely and effectively.
How To Get Your First Handstand Push Up in CrossFit
These steps ensure you develop proper technique and build the necessary strength and control incrementally.
Start with static positions to develop balance and alignment, and gradually progress toward dynamic movements.
1. Wall Handstands
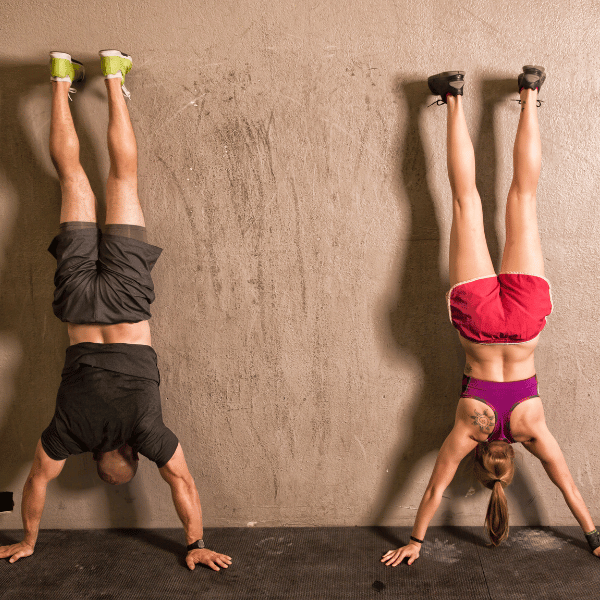
The wall handstand is the best place to start when learning the handstand push-up.
It helps you build strength and stability while focusing on maintaining a proper handstand position.
Mastering this step is essential before moving on to more advanced progressions.
To kick into a wall handstand with proper form, follow these steps:
- Begin in a standing position about a foot away from the wall, facing away from it.
- Place your hands on the floor shoulder-width apart, roughly six to eight inches from the wall.
- Kick one leg up toward the wall, keeping your arms straight and your shoulders engaged. Follow with the other leg until both feet are supported against the wall.
Once in position, focus on maintaining a straight line through your body.
Engage your core muscles, press actively through your shoulders, and avoid arching your lower back.
Start by holding the position for 10 seconds, gradually increasing the duration as you gain confidence and strength.
Aim to reach 60 seconds or more over time, as this will give you the endurance needed for dynamic movements like kipping handstand push-ups.
Handstand Hold Progressions
Once you’re comfortable with basic wall handstands, it’s time to refine your alignment and improve your core engagement with handstand hold progressions.
These steps will help you transition from wall-supported holds to freestanding handstands, a critical milestone for advanced athletes.
Wall-Facing Handstand Holds
Wall-facing handstand holds are an excellent way to work on proper alignment and core strength.
By facing the wall, you eliminate the tendency to arch your back and instead focus on a straight line from your hands to your toes.
Start in a high plank position with your feet against the wall. Gradually walk your hands closer to the wall as your feet move up.
Stop when your chest is just a few inches from the wall, and hold the position.
Engage your core, press through your shoulders, and keep your body tight to maintain control.
This drill teaches you how to align your body properly while upside down, a key element for efficient handstand push-ups.
Freestanding Handstand Holds
Freestanding handstand holds are the ultimate test of balance and control.
As you progress to this stage, practice holding a freestanding handstand for a few seconds at a time, gradually increasing your duration as you improve.
When attempting freestanding holds, start on a soft surface and ensure you’re comfortable rolling out of the position safely if needed.
Use controlled breathing to stay calm, and focus on stacking your shoulders, hips, and feet in a straight line.
Freestanding holds not only improve your balance but also prepare you for the dynamic stability required in movements like the strict handstand push-up.
2. Negatives Handstand Push Ups
When transitioning from static holds to dynamic movements, negatives can be beneficial.
These steps develop the eccentric strength and control needed for full handstand push-ups while providing support during the most challenging parts of the movement.
Controlled Descents: Building Eccentric Strength
Negatives, or controlled descents, are a great way to build strength in the bottom position of the handstand push-up. (2)
This part of the movement often feels like the limiting factor for many CrossFit athletes, making it a key focus for progress.
To perform a negative:
- Kick into a wall-supported handstand and stabilize yourself in the top position.
- Slowly lower yourself toward the floor, maintaining proper form. Engage your core, keep your elbows close to your body, and lower yourself in a straight line.
- Control your descent until your head gently touches the floor or an ab mat, then dismount safely.
Negatives allow you to work through the full range of motion while emphasizing control. Start with 2–3 reps per set and increase as your strength improves. Take a deep breath before each descent to maintain focus and stability.
3. Pike Push-Ups
The pike push-up is an effective bodyweight exercise for building the foundational strength and movement pattern required for handstand push-ups.
This scaled-down version of the HSPU targets your shoulders, triceps, and core muscles, emphasizing pressing strength in the vertical plane.
Benefits of Pike Push-Ups
Pike push-ups allow you to practice the mechanics of the HSPU while keeping your feet grounded or slightly elevated.
This reduces the load on your shoulders, making it a great way to develop the necessary strength for more advanced movements.
Additionally, pike push-ups are an accessible option for beginners, offering a progression path as your strength and mobility improve.
They also encourage proper form, helping you refine the pressing motion and core engagement needed for a full handstand push-up.
Steps to Progress the Pike Push-Up
- Starting Position: Begin in a high plank position with your hands shoulder-width apart. Walk your feet toward your hands until your hips are elevated and your body forms an inverted “V” shape. Keep your arms straight and your head neutral.
- Lowering Phase: Bend your elbows, lowering the top of your head toward the floor. Maintain a straight line from your hips to your shoulders, engaging your core muscles throughout the descent.
- Pressing Phase: Push through your hands to return to the starting position. Focus on keeping your shoulders stable and avoiding arching your lower back.
Elevating Your Feet
To increase the intensity, place your feet on an elevated surface such as a box or bench.
This shifts more of your body weight to your shoulders, making the exercise more challenging.
Adding a Deficit
For advanced athletes, perform pike push-ups with your hands on yoga blocks or parallettes.
This creates a deficit, allowing you to lower further and work through a greater range of motion.
Deficit pike push-ups are an excellent next progression before attempting strict HSPUs.
4. Strict Handstand Push-Up Practice
The strict handstand push-up (HSPU) is the gold standard for upper body strength and control in CrossFit.
Mastering this challenging movement requires a solid foundation, proper technique, and consistent practice.
Performing a Strict HSPU
- Starting Position: Kick into a handstand against a wall, ensuring your hands are shoulder-width apart. Your body should form a straight line from your hands to your toes, with your core engaged and your shoulders active.
- Lowering Phase: Begin by bending your elbows, lowering your head toward the floor in a controlled manner. Keep your elbows tucked close to your body to maintain shoulder stability.
- Pressing Phase: Once your head lightly touches the floor or an ab mat, push through your hands to return to the top position. Focus on maintaining proper form and avoiding arching your lower back.
Using Ab Mats for Reduced Range of Motion
If you’re not yet ready for the full range of motion, an ab mat can provide a great way to scale the movement.
Place one or more ab mats under your head to shorten the distance you need to lower.
As your strength improves, reduce the number of mats until you can perform the full movement.
Strict HSPU practice emphasizes strength and control, requiring the entire body weight to be supported in the vertical position.
With time and consistent effort, you’ll build the necessary strength, core stability, and confidence to master this challenging movement.
Fundamentals of The Handstand Push Up
Before you attempt a full handstand push-up, you need to focus on building a solid foundation of technique, strength, and mobility.
Without these, you risk developing poor form, hitting a plateau, or even injuring yourself.
The most important thing you can do at this stage is to identify your current level and work on the areas that need improvement.
Shoulder Mobility
Achieving 180° shoulder flexion is critical for getting into a proper handstand position.
If your shoulder girdle lacks the necessary mobility, you’ll struggle to maintain a straight line during the movement.
Tight shoulders often become the limiting factor, so improving mobility should be your first step.
Start with simple mobility exercises like banded distractions and PVC pass throughs.
Banded distractions are a great way to increase shoulder flexion while reinforcing proper technique.
Stand in a neutral position with your back against a wall and arms extended.
Move your arms in slow, controlled circles, gradually increasing the range of motion.
Another great exercise is using a dowel or PVC pipe for PVC pass throughs.
Hold the dowel with a wide grip at shoulder width, then slowly raise it overhead and behind your back, maintaining a straight line through your arms.
Taking time to improve your shoulder mobility not only makes your handstand push-ups safer but also sets you up for better performance in other movements like the overhead press and kipping HSPU.
Core and Upper Body Strength
Core strength is a key component of handstand push-ups.
Without a strong core, you’ll find it difficult to stabilize your lower body or maintain a good handstand position.
Start incorporating hollow holds into your routine.
Hollow holds are one of the best ways to engage your core muscles and build the isometric contraction strength needed for inversion.
Lie on your back with your arms extended overhead and legs straight.
Lift your shoulders and legs off the ground while keeping your lower back pressed into the floor.
This position mimics the hollow body shape required for a stable handstand.
Your upper body strength is just as important.
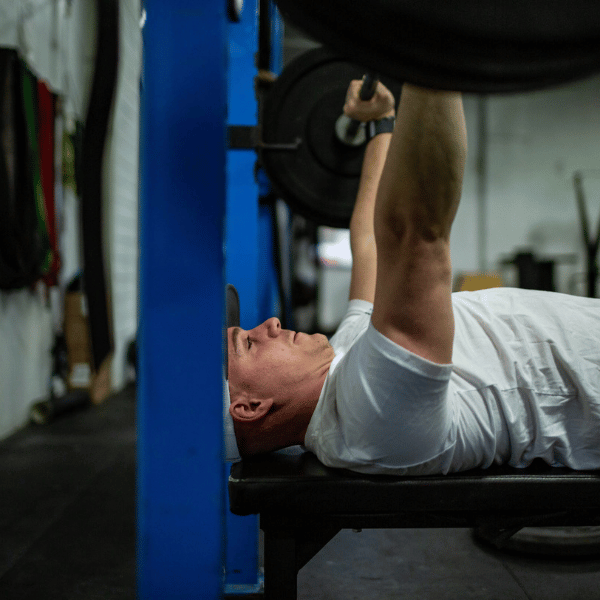
Handstand push-ups require significant overhead pressing strength, which means exercises like strict overhead presses, push presses, and even bench press variations should be part of your strength training.
These movements help you build the upper chest and shoulder strength needed to press your entire body weight in a vertical plane.
Getting Comfortable Upside Down
One of the biggest hurdles for many athletes learning handstand push-ups is becoming comfortable upside down.
Inversions can feel intimidating at first, but developing confidence in this position is critical for success.
Start with beginner-friendly drills like wall walks or assisted handstand holds.
Wall walks are a great place to begin because they allow you to gradually adjust to the inverted position.
Begin in a high plank position with your feet against the wall, then walk your hands back toward the wall as you move your feet up.
Stop when you feel stable and hold that position.
If wall walks feel too advanced, kick up into a supported handstand position with a mat underneath you.
This drill helps you become familiar with bearing your body weight on your hands while maintaining good form.
Safety is the most important thing during this phase.
Always use mats or yoga blocks to cushion potential falls, and consider having a spotter assist you.
Over time, you’ll feel more at ease and ready to move on to the next progression.
Technique Tips for Success
When working toward your first handstand push-up, mastering proper technique is critical.
Small adjustments to your form can improve your efficiency, reduce injury risk, and help you build strength faster.
Here are key tips to ensure you’re practicing with proper technique every step of the way.
Proper Hand Placement and Elbow Positioning
Start with your hands placed shoulder-width apart.
This position offers the best balance between stability and strength.
Your elbows should track at a 45-degree angle relative to your torso as you lower, preventing unnecessary strain on your shoulders.
Avoid flaring your elbows too wide, which can compromise your shoulder girdle stability and make the movement less efficient.
Engage Your Core for a Neutral Spine
Core engagement is essential to maintaining a straight line throughout the movement.
Keep your core muscles braced as if you’re about to take a punch to the stomach.
This will protect your lower back and ensure your body remains aligned in the vertical position.
Practicing hollow holds as part of your training is a great way to develop this isometric contraction skill.
Drive the Head Through the Arms for Lockout
At the top of the movement, focus on driving your head through your arms to achieve a strong lockout position.
This subtle adjustment activates your shoulder blades and ensures a complete range of motion.
It also improves overhead strength and sets you up for stability in other gymnastics movements.
Programming to Achieve Your First HSPU
Reaching your first strict handstand push-up requires a balance of regular practice, strength-building exercises, and adequate recovery.
A structured program tailored to your current skill level will provide the best results.
Training Frequency
With developing any skill or training characteristic training frequency and repetition is important. (3)
Incorporate handstand push-up practice into your routine 2-3 times per week.
This allows enough volume to see progress without overloading your shoulders or compromising recovery.
Suggested Session Structure
Each session should begin with a warm-up to prepare your shoulders, core, and wrists for the demands of the movement.
Follow this with skill drills focused on handstand holds, pike push-ups, or negatives, depending on your current level.
Finally, include supplementary exercises to build the strength required for the strict HSPU.
Supplemental Strength Exercises
- Overhead Presses: Build shoulder stability and pressing power in the vertical plane.
- Push Presses: Develop explosive overhead strength and reinforce proper lockout mechanics.
- Dumbbell Z-Presses: Improve core stability and shoulder mobility while pressing in a seated position.
Progression Guidelines
Start with assistance methods, such as using ab mats or resistance bands, and gradually reduce them as you build strength.
Over time, increase the volume of your reps and sets, ensuring you prioritize good form over rushing progress.
For advanced athletes, incorporating weighted vest variations or deficit HSPUs is the next level to challenge your capacity.
By sticking to a consistent and progressive approach, you’re not only building the necessary strength and technique but also ensuring you’re setting a solid foundation for success in this challenging movement.
Gradual Progression to Avoid Injuries
The most important thing you can do to prevent injuries is to progress at a pace appropriate for your current level.
Building a solid foundation of strength, mobility, and technique before attempting advanced drills like strict or kipping HSPUs is critical.
Rushing the process or skipping foundational steps often leads to overuse injuries in the shoulder girdle or lower back.
Remember, strength and control take time to develop, so be patient and let your progress unfold naturally.
Master Strict HSPUs Before Kipping Variations
Kipping HSPUs may seem like the next logical step, but it’s crucial to master the strict version first.
Strict HSPUs build the necessary strength and shoulder stability to protect your joints when dynamic movements are introduced.
Attempting kipping variations before you’ve developed sufficient strict strength increases the risk of injury to the neck, shoulders, and lower back due to poor control and compensatory movement patterns.
Final Thoughts on Getting Your First Handstand Push Up
Mastering the handstand push-up is a rewarding journey that builds strength, confidence, and control.
By focusing on foundational skills, progressing gradually, and prioritizing proper form, you’ll set yourself up for success while avoiding setbacks.
Celebrate each milestone, stay consistent, and trust the process—your hard work will pay off as you reach new levels in your fitness journey.
If you found this post helpful, consider subscribing to the free Bulletproof Training Program Newsletter to elevate your athletic performance entirely for free.
As a newsletter subscriber, you’ll get free weekly training that can be done in your garage or in your CrossFit gym, as well as deep dives on training concepts like this, designed to help you train smarter and reach your goals faster.
References:
1. Buckner, S. B., Bacon, N. T., & Bishop, P. A. (2017). Recovery in Level 7-10 Women’s USA Artistic Gymnastics. International journal of exercise science, 10(5), 734–742. https://pmc.ncbi.nlm.nih.gov/articles/PMC5609667/
2. Roig, M., O’Brien, K., Kirk, G., Murray, R., McKinnon, P., Shadgan, B., & Reid, W. D. (2009). The effects of eccentric versus concentric resistance training on muscle strength and mass in healthy adults: a systematic review with meta-analysis. British journal of sports medicine, 43(8), 556–568. https://doi.org/10.1136/bjsm.2008.051417
3. Kimura, T., & Nakano, W. (2019). Repetition of a cognitive task promotes motor learning. Human movement science, 66, 109–116. https://doi.org/10.1016/j.humov.2019.04.005


