Wall Walks in CrossFit: Standards, Progressions, and Tips
If you’re a CrossFit athlete or enthusiast, you’ve likely encountered the wall walk in your training or during Open workouts.
This movement, while simple at first glance, offers substantial benefits for your upper body and core strength.
By practicing wall walks, you’ll not only develop essential stability and endurance but also gain more control over your body in inverted positions, which can translate to other advanced movements in CrossFit.
As a staple movement in CrossFit, especially highlighted in recent Open workouts and CrossFit Games, the wall walk has gained prominence for its versatility and effectiveness.
It challenges your strength, mobility, and coordination, making it a valuable addition to your training.
But to gain the full benefits and avoid injury, it’s crucial to understand the standards and adhere to them closely.
Each wall walk repetition has specific guidelines, designed for safety and to ensure consistency across athletes.
Following these standards allows you to accurately track your progress and feel confident about your form, especially in competitions where precision is key.
Whether you’re training to compete or looking to improve your strength and stability, mastering wall walks will pay off in your workouts and overall CrossFit performance.
In this article, we’ll dive into the essential standards, progressions, and helpful tips for mastering wall walks in CrossFit, ensuring you build strength safely and effectively.
What Are The Wall Walk Standards in CrossFit?
Setup and Measurement
Tape Lines on the Floor:
In CrossFit, proper wall walk execution starts with the setup, which involves two precise tape lines marked on the floor.
Here’s what you’ll need:
Start/Finish Line:
This line is measured from the wall and set at different distances for men and women to account for varied height and arm reach.
For women, the line is placed 55 inches from the wall; for men, it’s 60 inches.
Second Line (10-Inch Line):
This line is positioned just 10 inches from the wall, measuring 30 inches in length and no more than 2 inches wide.
This line serves as a target for your hands when you reach the peak of each wall walk rep.
Purpose of Measurements:
The measurements in wall walks are not random; they’re carefully established to create official movement standards, for repeatable, safe, and measurable movement.
This consistency is essential in CrossFit, especially in online competition, to level the playing field and make sure athletes of all sizes are challenged similarly.
These distances also support safety by setting limits on movement range, helping you maintain control as you progress up and down the wall.
Movement Standards
Starting Position:
Each rep starts with you lying flat on the ground. Your chest, feet, and thighs must all touch the floor, ensuring you’re in a stable starting position.
Both hands must also be on the start/finish line tape, ensuring that every athlete begins from the same position, which keeps movements consistent and easy to judge.
Execution:
The wall walk requires precise movement and control as you transition up the wall.
Follow these steps for correct execution:
- Hands at the Start Line: Your hands must remain on the first tape line until both feet are securely on the wall. This ensures that your initial push begins from the floor, engaging your upper body from the outset.
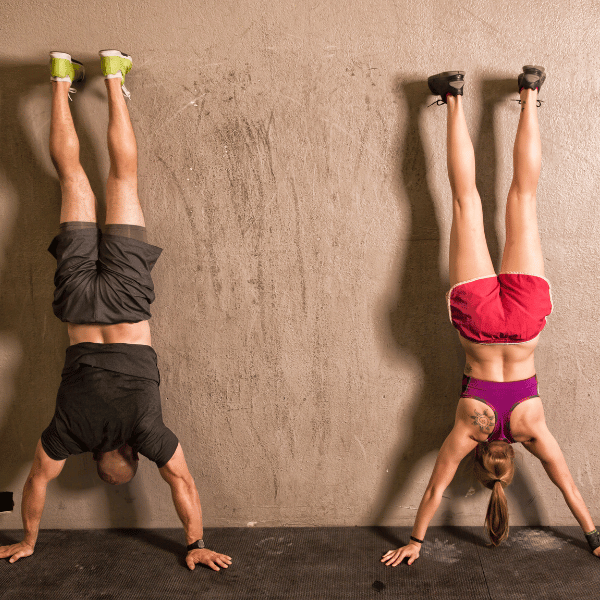
- Walking Up: As you move upward, place one foot at a time on the wall. Walk your hands backward, gradually shifting your weight into a fully inverted position until both hands reach the 10-inch mark. The top of the movement builds shoulder strength and stability, which is essential for many advanced CrossFit skills.
- Hand Contact on the Line: You’ll know you’ve reached the finish of each rep when any part of both hands makes contact with the edge of the tape. CrossFit allows for any part of the hand to touch the line, which provides a bit of flexibility based on your reach.
Descent and Finish:
As you come down, keep your feet on the wall until both hands return to the start/finish line.
This descent emphasizes control, demanding that you maintain a neutral spine with tension and stability through your core and shoulders.
The rep is complete once you’re back in the starting position, with your chest, feet, and thighs in contact with the floor.
This finish reinforces proper form, helping to reduce injury risk as you accumulate reps and fatigue.
Scaled Wall Walk Standards
Key Differences in Scaled Version
The scaled wall walk has a few significant modifications to make it more accessible based on your fitness level while still challenging your strength and coordination.
Here’s what sets it apart:
One Tape Line at Shoulder Height:
Instead of two floor lines, scaled wall walks only require one line placed at shoulder height.
This setup lets you focus on form and balance without needing to reach the higher tape line that RX athletes use.
Hand Positioning:
In the scaled version, you start with your hands fully in front of the line.
As you walk up, your goal is to pass this line completely, ensuring that both hands move fully beyond the shoulder-height mark before descending.
Who Should Use the Scaled Version
Athletes new to wall walks or those working on foundational strength may choose the scaled version.
If it’s your first workout with wall walks and you’re still building your shoulder stability, core strength, or comfort with inverted movements, this scaled approach allows you to develop these areas gradually.
By using the scaled standard, you still benefit from improved strength and coordination without the added strain of the full RX movement.
Wall Walk Progressions
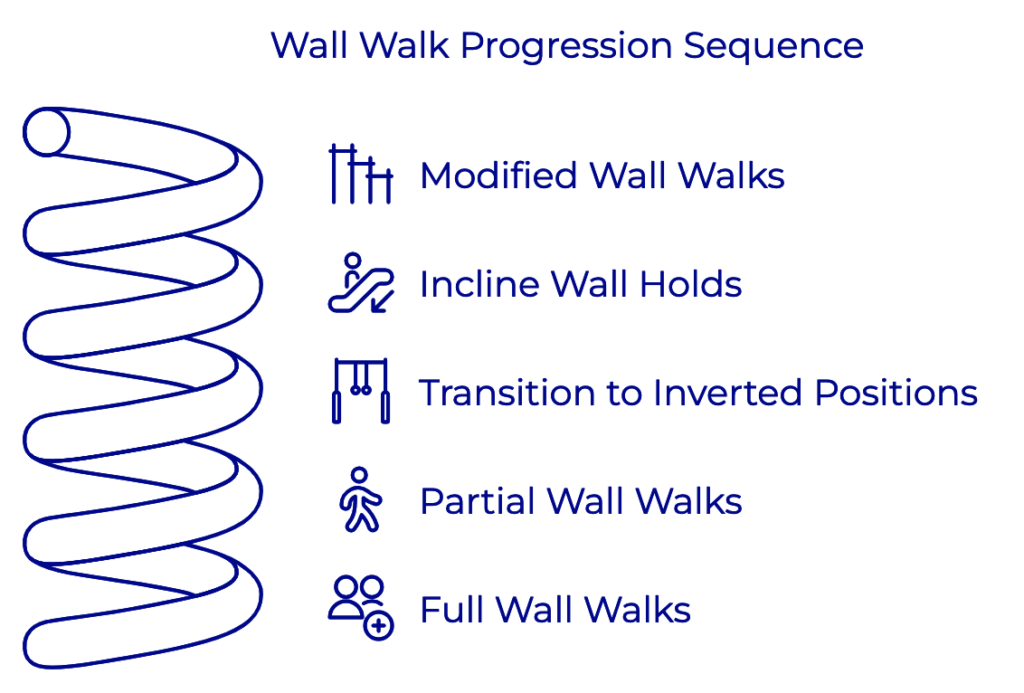
Progressions are a key way to build up to full wall walks for athletes of different ability levels.
Here’s how you can work up to RX standards safely and effectively.
Progression for Beginners
For beginners, modified wall walks or incline wall holds are and ideal first step.
Start with an elevated surface like a bench or box instead of going fully vertical.
This allows you to build foundational strength to maintain good form and confidence while still engaging your core and shoulders.
Modified wall walks also give you the chance to practice movement coordination before advancing.
Intermediate Progressions
As you build strength, transition to holding inverted positions for time or performing partial wall walks.
Focus on walking up halfway and holding that position.
This progression helps you work toward the control and endurance needed to complete full wall walks.
Gradually increase the time you hold the position to improve stability and strength in the upper body.
Advanced Wall Walks and RX Standards
When you’re comfortable with the intermediate steps, progress to full wall walks, aiming to follow RX standards.
At this stage, your focus should be on precise execution, hitting the proper start and finish positions, and maintaining controlled movement throughout the rep.
Full wall walks challenge your strength, body control, and endurance, all crucial for excelling in CrossFit workouts and Open events.
By following these progressions, you’ll steadily build the strength and control required to master wall walks, whether you’re a beginner just joining the crossfit community or among the sports top athletes aiming to improve your Open performance.
This gradual approach ensures a safe path to reaching RX standards while keeping your training consistent and pain-free.

Wall Walk Efficiency Tips
Proper Hand and Foot Placement
To execute efficient technique in the wall walk, proper hand and foot placement is crucial for maintaining stability and balance.
Here are some tips to consider:
Hand Position:
Start with your hands shoulder-width apart on the tape line, ensuring that your wrists are aligned directly under your shoulders.
This position maximizes strength and stability as you walk up the wall.
Foot Position:
When you push off the ground, your feet should be hip-width apart. This creates a solid base of support and allows you to shift your weight effectively as you ascend.
As you walk up the wall, your feet should stay in contact with it, allowing for a smooth transition.
Controlled Movements
Moving with control is vital during wall walks. Rapid or jerky movements can lead to loss of balance and potential injury.
Aim to perform each phase of the movement deliberately:
Ascend Slowly:
Take your time as you walk your feet up the wall. Focus on one foot at a time, engaging your core and glutes for stability.
Descend with Control:
Just as you ascended, lower your body slowly. This controlled descent not only maintains form but also reinforces the strength you’re building.
Breathing and Core Engagement
Proper breathing and core engagement significantly impact your performance in wall walks:
Core Engagement:
Activating your core is essential for maintaining a stable position. Before you begin, tighten your abdominal muscles to create a strong foundation that supports your body weight.
Breathing Technique:
Inhale as you prepare to ascend and exhale as you walk up the wall. This rhythm helps maintain stability and encourages a more controlled movement.
Avoiding Common Mistakes
To maximize your effectiveness and safety while performing wall walks, be aware of these common mistakes and how to avoid them:
Rushing the Movement:
Many athletes rush through wall walks, which can compromise form and efficiency. Focus on controlled, deliberate movements instead of speed.
Poor Core Engagement:
Failing to engage your core can cause your hips to sag, making it harder to maintain balance and transfer power form the arms to the legs. Always engage your core before starting and throughout the movement.
Incorrect Hand Placement:
Make sure your hands are positioned correctly on the tape line. Misalignment can lead to instability and make the movement more difficult as well as cause no-reps.
Not reaching the standard distance:
Ensure that the hands clear the required tape mark before returning to the starting position to ensure a full repetition.
Wall Walks in CrossFit Programming
Why Wall Walks Are Included
Wall walks are a staple in CrossFit programming for several reasons:
Shoulder and Core Endurance:
Wall walks challenge your shoulder and core muscles, enhancing endurance and strength. This improved stability translates to better performance in various other movements.
Functional Strength:
By mimicking the action of climbing or using your body weight, wall walks contribute to overall functional strength, which is essential for daily activities and other athletic endeavors.
Examples of Wall Walk Workouts
Incorporating wall walks into your training can be both fun and effective.
Here are a couple of example workouts:
- AMRAP (As Many Rounds As Possible) in 10 Minutes:
- 5 Wall Walks
- 10 Push-Ups
- 15 Air Squats
This workout challenges both your strength and endurance, as you’ll need to maintain form throughout.
- Ladder-Style Workout:
- 1 Wall Walk, 1 Burpee
- 2 Wall Walks, 2 Burpees
- 3 Wall Walks, 3 Burpees
- Continue adding one rep for each round until time is called (e.g., 10 minutes).
This format builds intensity as you increase the total number of reps each round, providing a comprehensive workout.
Training Wall Walks Outside of Competition
To develop your wall walk skills outside of competition settings, consider these tips:
Include in Warm-Ups:
Incorporate wall walks into your warm-up routine to familiarize yourself with the movement and reinforce proper technique.
Set Dedicated Skill Days:
Designate specific training days to focus on wall walks, emphasizing progressions and working on areas that need improvement.
Utilize Variations:
Practice variations, such as incline wall walks or wall holds, to build strength and confidence. This approach helps you develop the necessary muscle control for full wall walks.
FAQ Wall Walk Standards and Modifications
What Are Recent Changes in Wall Walk Standards?
Over the years, CrossFit has made several adjustments to wall walk standards, particularly from CrossFit Open workout 21.1 to 23.3.
Here’s a brief summary of these changes:
Tape Line Adjustments:
The initial distance of the start/finish line from the wall was standardized to provide more consistency across competitions.
Previously, the measurements may have varied slightly in different workouts, leading to confusion among athletes.
Now, the clear distinctions—55 inches for women and 60 inches for men—ensure all participants are competing under the same conditions.
Execution Standards:
The execution requirements have also been refined to emphasize safety and performance.
For example, athletes must keep their hands on the starting line until their feet are firmly on the wall, ensuring proper control and alignment throughout the movement.
Scaled Version Enhancements:
Recent updates have clarified the scaling options, particularly for athletes who need to modify the movement.
The scaled version now uses a single tape line at shoulder height, allowing for a more accessible approach while still retaining the essential elements of the wall walk.
These changes reflect CrossFit’s ongoing commitment to standardizing workouts and ensuring athletes can compete safely and effectively.
Should Wall Walks Be Scaled for Mobility Limitations?
Yes, athletes with mobility limitations—particularly in the shoulders or wrists—should consider modification options for wall walks.
Mobility can significantly impact your performance in this movement, and modifying the exercise can help maintain safety and effectiveness.
Here are some considerations:
Shoulder Limitations:
If you have restricted shoulder mobility, executing wall walks as prescribed may place undue stress on your joints, especially at the end of each rep, where the shoulder flexion demand is the highest.
In such cases, it may be beneficial to practice incline wall walks or wall holds at a lower angle.
This allows you to strengthen the necessary muscles without compromising your shoulder health.
Wrist Limitations:
Athletes with wrist pain or limited range of motion should ensure that their hands are positioned correctly on the floor.
Using a wrist brace or modifying the angle of the wall walk can help alleviate discomfort.
Practicing forearm wall walks (where your forearms are on the wall) can also be an effective way to develop strength while minimizing wrist strain.
Scaling Options:
The scaled version of wall walks, with the single tape line at shoulder height, is an excellent alternative for those who struggle with the full movement.
This modification allows you to maintain the essence of the wall walk and learn the basics of inversion while adjusting for individual mobility constraints.
Final Thoughts on Wall Walk Standards For CrossFit
Adhering to wall walk standards is vital for ensuring both safety and performance in the sport of fitness.
Understanding the setup, execution, and modifications can help you optimize your CrossFit training and competitiveness.
Consistently practicing wall walks with the correct form reinforces proper technique, allowing you to build strength and confidence.
I encourage all athletes to practice and refine their wall walks during training sessions.
Regular practice improves proficiency and boosts confidence during competitions.
Remember, prioritizing form and control over speed is essential for achieving better results and minimizing the risk of injury.
Focusing on these aspects will lead to improved performance and a stronger foundation in your CrossFit journey.
If you found this post helpful, consider subscribing to the free Bulletproof Training Program Newsletter to elevate your athletic performance entirely for free.
As a newsletter subscriber, you’ll get free weekly training that can be done in your garage or in your CrossFit gym, as well as deep dives on training concepts like this, designed to help you train smarter and reach your goals faster.


