Deep Dive
5 Steps to Fix Knee Pain Without Stopping Your Training
Knee pain is one of those injuries that sneaks up on you.
It starts as a little discomfort at the bottom of a squat or a dull ache after a long metcon. Then one day you realize you have been modifying every lower body workout for three weeks and nothing has changed.
Most athletes either push through it and hope it resolves on its own, or they cut out all squatting and lunging and lose weeks of hard-earned lower body capacity.
Neither works. And neither gets to the actual problem.
The good news is that knee pain in CrossFit follows a very predictable pattern. Once you understand what is driving it, fixing it becomes a lot more straightforward than most people expect.
Here is how to do it without stepping away from training.
Why Your Knee Hurts During CrossFit
The knee is a hinge joint that sits between your hip and your ankle. It does not have much inherent mobility of its own.
What it has is a job to do, and that job is to transfer force between two highly mobile structures above and below it.
When your hips cannot load properly and your ankles cannot dorsiflex, the knee fills the gap.
It gets asked to do more than it was designed for, and over enough reps under enough load, that catches up with you.
The most common presentations in CrossFit athletes are patellar tendinopathy (pain just below the kneecap), patellofemoral pain (pain behind or around the kneecap), and general joint irritation from accumulated volume without adequate mobility and strength to support it.
Thrusters, front squats, wall balls, box jumps, and running all place significant demand on the knee.
The tendons and cartilage around the joint adapt more slowly than your cardiovascular fitness does. When your conditioning climbs faster than your structural capacity, pain shows up.
Step 1: Figure Out What You Are Actually Dealing With
Before you change anything about your training, figure out what is happening at the knee.
Stand with your feet hip-width apart and perform a slow bodyweight squat to the bottom. Note exactly where the pain is, what depth it starts at, and whether elevating your heels slightly changes anything.
If heels elevated significantly reduces your pain, ankle dorsiflexion is a primary driver and that is where you start.
If pain sits just below the kneecap and worsens the longer you hold a bent-knee position, you are most likely dealing with patellar tendinopathy.
That is a loading issue, not an inflammation issue, and it responds best to the progressive tendon loading approach in Step 3.
Pain that locks, catches, gives way, or comes with significant swelling warrants a professional evaluation before you start self-treating.
Step 2: Restore Ankle and Hip Mobility First
The knee will keep getting irritated as long as the joints above and below it are restricted.
For ankle dorsiflexion, use the banded ankle mobilization. Loop a band around a rack at ankle height, step your foot through so the band sits just above the ankle joint, and drive your knee forward over your fifth toe while keeping your heel flat.
Ten reps per side before training. This addresses the joint restriction directly rather than just stretching the calf tissue.
For hip mobility, use the 90/90 hip stretch. Sit with both legs at 90 degrees, one in front and one behind, and hold for 45 to 60 seconds per side while sitting tall. When the hip cannot rotate and load efficiently, the knee compensates on every squat and lunge rep. Improving hip mobility takes that demand off the knee.
Step 3: Load the Knee Progressively
Just like elbow tendon pain, knee tendon pain does not respond to rest or passive treatment. The tendon needs load to adapt.
For patellar tendinopathy, start with wall sits. Find a wall, sink into a squat at 60 to 90 degrees of knee flexion, and hold for 30 to 45 seconds. Five sets.
Isometric loading has strong evidence for reducing tendon pain in the short term while beginning the adaptation process. Do this before your training session on reactive days.
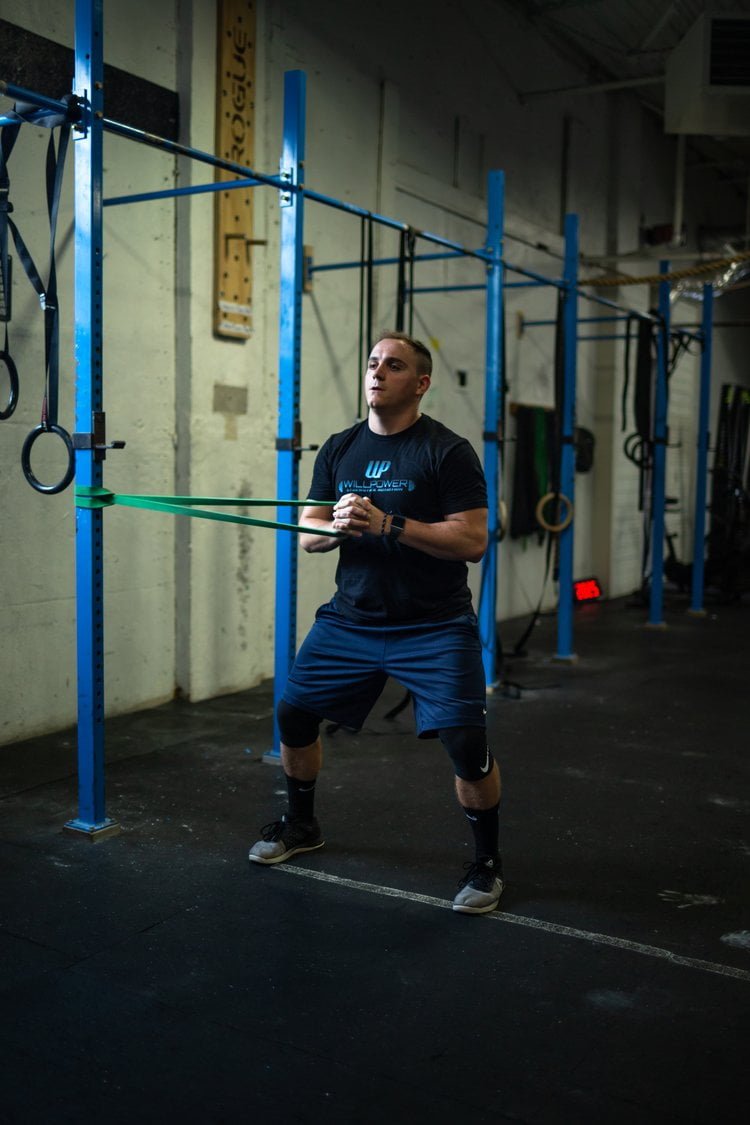
Once pain settles over one to two weeks, progress to Spanish squats. Anchor a band to a rig, step back against the tension, and squat with your shins as vertical as possible.
Three sets of 10 to 12 reps with a slow, controlled tempo. This builds quad strength and tendon capacity with significantly less patellofemoral compression than a standard squat.
Step 4: Retrain the Squat Pattern Under Load
Stronger tissue does not automatically fix the movement pattern that caused the problem.
The most common fault in CrossFit athletes with knee pain is valgus collapse, the knees caving inward at the bottom of every squat rep.
This pattern gets reinforced thousands of times before pain appears, and undoing it takes deliberate, consistent practice.
Start with banded goblet squats. Place a light band just above your knees, hold a kettlebell at your chest, and squat with the active intention of pushing your knees out against the band through the entire range of motion.
Three sets of 10, slow descent, pause at the bottom.
The band gives you immediate feedback if your knees are caving and forces the hip abductors to work the way they are supposed to.
Add load only when your knee tracking is consistent from the first rep to the last.
Add single-leg Romanian deadlifts to build the hip stability and posterior chain strength that protects the knee during unilateral loading.
Three sets of eight per leg, controlled throughout.
Step 5: Keep Training With Modifications
Stopping all lower body work is the wrong answer. It tells your tissues there is nothing to adapt to, and capacity decreases. The goal is to manage the load, not remove it.
Temporarily swap high-impact movements like box jumps, running, and thrusters for lower-impact options like rowing, ski erg, or bike.
You keep the cardiovascular output while reducing the reactive loading through the knee.
Scale front squat and thruster volume down and fill the gap with hip hinge and single-leg work.
Romanian deadlifts, single-leg deadlifts, and step-ups load the posterior chain without the same compressive demand on the patellofemoral joint.
On training days where squatting is unavoidable, use a 10mm heel wedge or a small plate under your heels.
This reduces the dorsiflexion requirement and lets you train through a more complete range while the ankle mobility work catches up.
Wrapping Up on Fixing Knee Pain
Knee pain does not go away on its own if the pattern driving it stays the same. Volume keeps accumulating, compensations keep layering, and eventually the modification list gets longer than the workout itself.
But you do not have to choose between training and fixing your knee. You just have to be intentional about both at the same time.
Work through these steps in order, pay attention to what changes week to week, and give the tendon loading work the consistency it needs to work.
The athletes who get past this are the ones who stop waiting it out and start treating it like something trainable.
Dealing with knee pain that is limiting your squats, lunges, or metcons?
Click the button below to schedule a free consultation and get a plan built around your knee and your training.