9 Essential At Home CrossFit Movements For Beginners
CrossFit training doesn’t need to be reserved for actual gyms anymore. If you want to reap the rewards of high-intensity functional movements that have become the trademarks of CrossFit training, then this article is for you.
Although CrossFit is made up of dozens of movements that, by their definition, are found in nature and move large loads, and long distances quickly, they all step from the nine foundational movements that are taught in CrossFit level one course.
They set the foundation for great movement for each CrossFit athlete training at home, whether they are training for the CrossFit Open with their friends or aspire to stand on top of the podium at the CrossFit Games.
But don’t be confused. Although these movements serve as fundamentals in your training, they are anything but easy and make up some of the most popular workouts in CrossFit.
Ranging from basic air squats to more complex Olympic weightlifting movements, this article will provide an overview of the essential home CrossFit movements you need to start training at home ASAP.
I’ll also provide several variations and movement progressions for each one so that you can continue to challenge yourself and build your fitness over time.
Join the free Bulletproof Training Program for weekly workouts and practical tips on training, nutrition, and mobility to elevate our fitness and train pain-free! (Subscribe here)
What Are The 9 Essential At Home CrossFit Movements?
The most essential at-home CrossFit movements are the nine movements that Greg Glassman used when he first founded CrossFit.
The “foundational movements” are the framework for almost any barbell movement you perform in a CrossFit gym or garage gym during your workout of the day (WOD)
Once you master these nine movements, you can expand them to more advanced movements. In the sections below, we’ll outline the nine foundational movements to master and then provide variations for you to progress your fitness after you do so.
1. Air Squat
Air squats are the cornerstone of CrossFit’s foundational movements. Although they may seem trivial, most people starting CrossFit for the first time struggle to nail the performance points for the Air Squat.
These include feet shoulder-width apart, chest up, core tight, and weight in your heels. Keep your knees tracking over your toes and continue descending until your hip crease is below parallel as you lower down.
I remember when I first began training in CrossFit, I would perform countless reps in my living room in front of the television, trying to mobilize and build strength in the movement pattern.
Don’t be afraid to take a step back and work on the basic air squat. They are a staple in many CrossFit WODs, so getting them right is crucial to your future success.
If you already have a great air squat, consider using a weighted vest to increase your strength and endurance without holding any weights.
Watch a demo video: (LINK)
Variations To The Air Squat
Below are some variations to the air squat that can also serve as progressions once you master it.
Goblet Squats
Goblet squats are my go-to variation for new CrossFit athletes since they challenge your strength and promote greater movement quality. Grab a dumbbell or kettlebell, hold it close to your chest, and squat away.
It’s a great way to add some weight without the complexity of a barbell as you build strength and endurance in the squat pattern. This variation also helps keep your chest and core engaged to prepare for barbell squatting.
Watch a demo video: (LINK)
Back Squats
Back squats are where the real magic happens because you can start to load the squat pattern with heavier loads via a barbell.
The back squat calls for a barbell to be placed across your back, but from there, it is essentially the same movement as the air squat. Hence, the emphasis on the air squat starts the progression of the squat.
Watch a demo video: (LINK)
Box Squats
Box squats can be a game-changer for those struggling with depth. Use a sturdy box or bench and squat down until you’re barely touching it to perform a squat to box, or you can pause for a second and then explode off of it to perform a true box squat.
This variation helps build confidence, improves your squat depth over time and can help increase strength in the bottom position of the squat
Watch a demo video: (LINK)
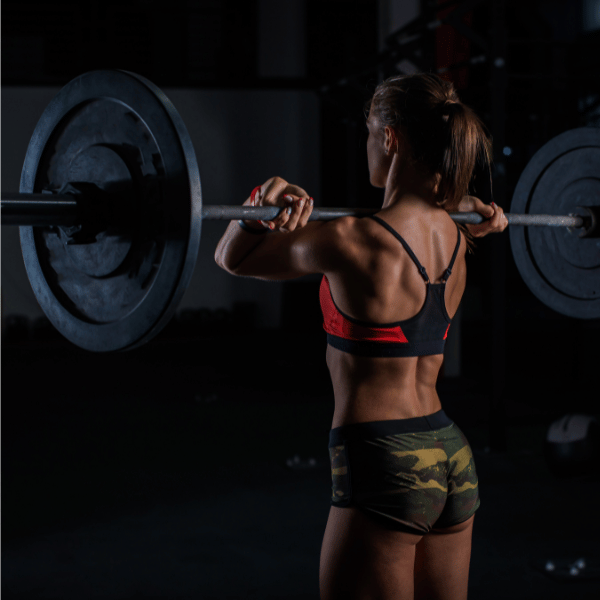
2. Front Squat
The front squat places the barbell on the front of the shoulders rather than the back like the back squat. It is a great tool for incorporating heavy squat training if you are still working on your back squat.
Since the barbell is in front of your body, it promotes a more upright posture and better technique like the goblet squat does.
Keep your elbows high, core tight, and chest up to perform an optimal front squat. From there, it is nothing more than an air squat.
I remember struggling to maintain proper form during high intensity workouts that included front squats, but with time, you build endurance in the movement and are able to knock them out without issues.
Front squats are fantastic for building quad strength and improving posture. They’re also a staple in many CrossFit WODs, so mastering them is key.
Watch a demo video: (LINK)
Variations To The Front Squat
Below are some variations to the front squat that can also serve as progressions once you master it.
Squat and Press with a Plate
This variation is perfect for home workouts. Grab a weight plate, hold it at chest level, squat down, then as you stand, press the plate overhead. I love throwing these into a quick warm-up when I’m short on time.
Watch a demo video: (LINK)
Dumbbell Front Squats
Don’t have a barbell? No problem! Dumbbell front squats are a great alternative and are often more challenging in their own right. Simply hold two dumbbells at your shoulders and perform a squat.
They’re easier on the wrists and great for working on core strength and balance. I often use these when traveling or in my garage gym.
Watch a demo video: (LINK)
Zercher Squats
Zercher squats are an unconditional squat movement, but they are quite challenging. Hold the barbell in the crooks of your elbows. It initially feels weird, but they will light up your core and upper back.
I avoided these for ages but was hooked once I gave them a shot because of the core engagement. They’re tough, but the carryover to other lifts is incredible.
Watch a demo video: (LINK)
3. Overhead Squat
The overhead squat is the ultimate test of mobility, strength, and balance. It involves almost every joint in your body and will expose you, as it did me if you lack capacity in any of them.
Start with a PVC pipe or empty barbell overhead, arms locked out. As you squat, keep that bar directly over your heels and continue descending until the hip crease below the thigh.
I spent weeks working on shoulder mobility and ankle flexibility to nail this move, and you may have to do so as well. But trust me, it’s worth it.
Overhead squats are not just a CrossFit staple; they’re incredible for developing overall body awareness and control.
Watch a demo video: (LINK)
Variations To The Overhead Squat
Below are some variations to the overhead squat that can also serve as progressions once you master it.
Single Arm Dumbbell Overhead Squats
This variation is a humbler and requires even more mobility than the traditional overhead squat. Hold a dumbbell overhead with one arm and squat. It challenges your balance and core stability like crazy.
I love throwing these into a workout when I want to spice things up. They may also be great for your garage workouts if you haven’t gotten a barbell yet. Plus, they’re great for identifying and correcting imbalances between sides.
Watch a demo video: (LINK)
Snatch Balance
The snatch balance is similar to an overhead squat, but rather than controlling the descent down, you rapidly drop under the bar. Start with the bar on your back, dip, and drive it overhead as you squat.
It’s a key movement for perfecting your snatch technique. These can be tricky movements to gain confidence in, but they are extremely beneficial once you nail down the technique.
Watch a demo video: (LINK)
Sotts Press
The sotts press is one of the most demanding movements you can do in training, but it can also be a great workout. Start at the bottom of an overhead squat and press the bar overhead.
If you have difficulty stabilizing the barbell overhead during overhead squats, then a sotts press progression is exactly what you need.
Maintaining an upright torso on these can be tough, but feel free to slip weight plates under your heels or use a squat wedge.
Watch a demo video: (LINK)
4. Shoulder Press
No other upper-body pressing movement elicits the same strength and muscle mass development as the shoulder press.
It challenges the upper body muscles, unlike any other movements I have experienced in CrossFit. Thus, if you want an effective workout, shoulder presses must be in your fitness program.
Begin with the barbell in the front rack position and press it over your head. As you press up, squeeze your glutes and core to create a solid foundation for pushing.
Like most CrossFit athletes, I used to arch my back to raise the weight. But you want to avoid this. So, keep your body tight and push your head through at the top of the movement.
Watch a demo video: (LINK)
Variations To The Shoulder Press
Below are some variations to the shoulder press that can also serve as progressions once you master it.
Dumbbell Shoulder Press
This variation is perfect for home workouts. You can do it seated or standing – I prefer standing for the extra core engagement.
Start with the dumbbells at shoulder height and press straight up. The beauty of dumbbells is they allow for a more natural range of motion and can help correct imbalances between sides.
Watch a demo video: (LINK)
Landmine Press
Wedge a barbell into a corner or use a landmine attachment for the landmine press. Grab the end of the bar at shoulder height and press up and slightly forward.
It’s easier on the shoulders and great for building functional strength. I love these because they have an element of instability that helps promote shoulder health.
Watch a demo video: (LINK)
Z-Press
The Z-Press is a humbling exercise. Sit on the floor with your legs straight out in front of you and press the bar (or dumbbells) overhead. It eliminates any chance of using momentum from your legs.
Watch a demo video: (LINK)
5. Push Press
The push press is all about explosive power and uses the legs to help drive the barbell overhead. The push press lets you handle heavier weights than a strict press, making it great for building overall strength and power.
Start with the bar at your shoulders, dip slightly at the knees, then explosively drive up, using that leg power to help press the bar overhead.
The key to a successful push press repetition is timing your leg drive with the press from the shoulders, so practice this transition at lighter loads and build in weight as you connect the legs to the arms better.
Watch a demo video: (LINK)
Variations To The Push Press
Below are some variations to the push press that can also serve as progressions once you master it.
Dumbbell Push Press
This variation is perfect for garage workouts if you are tight on space or don’t have a barbell yet. Grab a pair of dumbbells and follow the same dip-and-drive motion.
Dumbbells are also a better option if you lack range of motion overhead. They’re also great for identifying and correcting any strength imbalances between arms.
Watch a demo video: (LINK)
Kipping Handstand Push-Up
Kipping handstand push-ups are an advanced gymnastic movement. Start in a handstand position against a wall, lower your head to the ground, and then use a kip to drive back up.
It’s a challenging movement that combines strength, balance, and coordination. I wouldn’t attempt these until you can strictly press roughly 70% of your own body weight to ensure you have the baseline strength that’s needed for them.
Watch a demo video: (LINK)
Behind-the-Neck Push Press
This variation requires good shoulder mobility. The bar starts behind your head instead of in front.
It took me a while to get comfortable with this one, and if your shoulders really lack mobility, then it might not be for you, but it’s great for developing overall shoulder strength and stability. Just be sure to start light and focus on a vertical bar path.
Watch a demo video: (LINK)
6. Push Jerk
Like the push press, the push jerk uses the legs to help get the barbell overhead. The main difference is that the push jerk is a catch rather than a press.
The key is coordinating the lower body drive with the upper body press and the quick dip under the bar.
Start with the bar at your shoulders, dip slightly, then explosively drive up. As the bar leaves your shoulders, quickly dip under it by bending your knees.
It can take some time to perfect this transition, but once you master it, there is no better way to lift heavy weights over your head.
Watch a demo video: (LINK)
Variations To The Split Jerk
Split Jerk
The split jerk takes the push jerk to the next level. Instead of dipping straight down, you split your legs front and back as you dip under the bar.
This adds an extra element of coordination and balance, but the spile stance will allow you to lift the most weight possible overhead.
Watch a demo video: (LINK)
Dumbbell Push Jerks
Don’t have a barbell? No problem! Simply grab a set of dumbbells for Dumbbell push jerks. Dumbbell push jerks are another fantastic variation for home or garage workouts.
They follow the same principle as the barbell version but allow for an easier range of motion and can help correct side-to-side imbalances.
It can also be argued that dumbbells are even harder than barbells because of the instability they create.
Watch a demo video: (LINK)
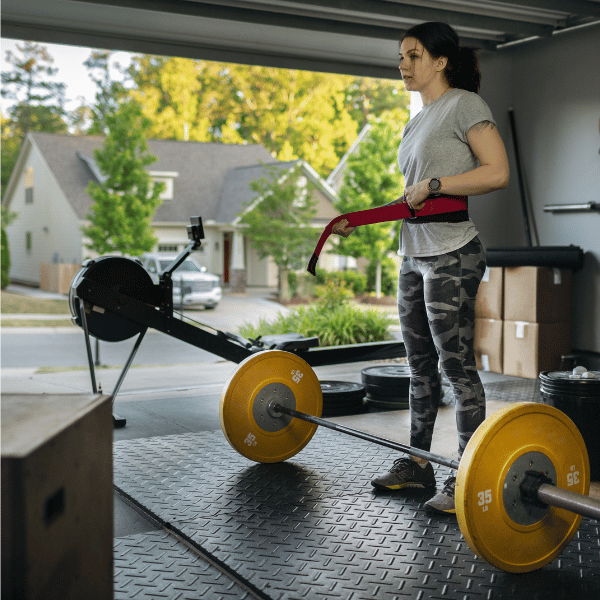
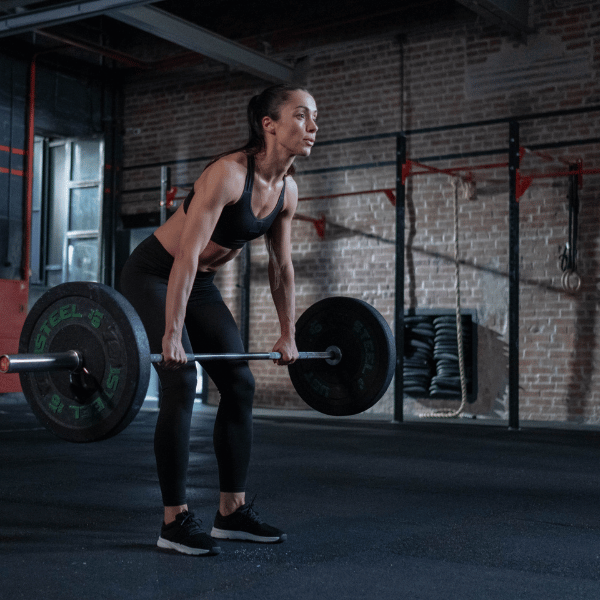
7. Deadlift
The deadlift is the king of all lifts and utilizes the most muscle mass and nervous system recruitment of all the barbell lifts.
The key is in the setup: feet hip-width apart, bar over midfoot, hinge at the hips, grab the bar, and lift. Keep that back flat and core tight.
To maximize your deadlift performance and, say, injury-free, you will want to emphasize a neural spine and learn how to brace through your midsection.
You can do so by inhaling via the diaphragm to expand the belly, followed by an abdominal and lat contraction to maximize intra-abdominal pressure as you lift.
Watch a demo video: (LINK)
Variations To The Deadlift
Below are some variations to the deadlift that can also serve as progressions once you master it.
Romanian Deadlifts
RDLs are fantastic for targeting the hamstrings and are the purest form of the hinge pattern. Start at the top, hinge at the hips, and lower the bar along your legs.
I love these for building posterior chain strength and training the deadlift while giving our nervous system a break from heavy lifting.
Watch a demo video: (LINK)
Sumo Deadlifts
The sumo stance feels weird at first, but it’s great for those with sore lower backs or those working on hip mobility.
To perform a sumo deadlift, position your feet wide, hands inside the legs, and assume a slightly more squatting position as you grab the barbell.
They can take some getting used to, but once you find your optimal setup, these are a fun lift to train.
Watch a demo video: (LINK)
Single-leg Deadlifts with Dumbbells
Talk about a balance challenge! These are perfect for home workouts and great for addressing imbalances.
Perform the RDL motion but stand on one leg. This emphasizes lateral hip stabilization and increases the metabolic demand on the posterior chain muscles.
Watch a demo video: (LINK)
8. Clean
The clean is another staple in CrossFit training and should be part of your workout program to some degree. It involves moving a barbell from the floor to the shoulders rapidly but with three steps to the pull.
The first pull is under control and raises the barbell above the knees. The second raises the barbell to the hips, and the final pull extends the hips rapidly to accelerate the barbell to the shoulders as you descend into a squat to receive it.
To build strength and power in the clean, stick to lower repetitions, but if you want to build capacity, then aim for high rep counts with a short period of rest.
Watch a demo video: (LINK)
Variations To The Clean
Below are some variations to the clean that can also serve as progressions once you master it.
Power Clean
The power clean is an even more explosive variation of the traditional clean. Instead of dropping into a full squat, you catch the bar in a quarter squat position.
Power cleans are great, improving the third pull of the clean and during a CrossFit home workout with many repetitions that a squat clean would not allow.
Watch a demo video: (LINK)
Hang Clean
This variation really helped me nail the timing of the second pull. Rather than starting on the floor, start with the bar at your knees or mid-thigh.
The hang clean tasks away the momentum and force you can from the legs and posterior chain during the first pull. Making it a great option for improving IP extension strength and speed under the barbell.
Watch a demo video: (LINK)
Dumbbell Cleans
The movement is similar to barbell cleans but with a dumbbell in each hand.
I have found that dumbbell cleans are best served inside CrossFit metcons because, although they can be very challenging, they don’t allow for loads that are heavy enough to increase maximal strength.
To perform them, simply move through the three pulls as you would with a barbell and catch them in either a squat or a power stance, depending on the variation you are training for that day.
Watch a demo video: (LINK)
9. Snatch
The snatch forms a love-hate relationship with every CrossFit athlete, whether you are training at home or looking to win in the sport of fitness.
Some days, they feel great, and you feel like you can hit any weight you put on the barbell, and others, you can’t seem to hit your warm-up weights.
Regardless, they are one of the best CrossFit exercises for developing explosive power and capacity.
Start with the bar on the ground, grip it wide, and in one fluid motion, pull it overhead while dropping under to catch it in a squat.
While also keeping the bar close to our body throughout the three pull phases.
Watch a demo video: (LINK)
Variations To The Snatch
Below are some variations to the snatch that can also serve as progressions once you master it.
Dumbbell Snatch
This variation is perfect for high-intensity workouts since the cycle rate is much faster than a barbell.
It’s also less technical than the barbell version and great for beginners to work their snatch, yet it can give advanced athletes a run for the money when weights and repetitions are high.
Start with the dumbbell between your feet, then explosively pull it overhead in one motion.
Watch a demo video: (LINK)
Hang Power Snatch
Similar to the hang clean, start with the bar at your knees or mid-thigh.
This variation also helps you focus on the explosive second pull, which increases your hip extension strength and speed under the bar to catch in a power position.
Watch a demo video: (LINK)
Muscle Snatch
The muscle snatch moves the barbell from the floor to overhead in one fluid motion. The difference here is that you are literally “muscling” the barbell overhead.
To complete the exercise, you rely solely on your legs, upper body, and posterior chain strength to pull the barbell overhead.
Nothing changes with the pull phases, but once you extend the hips after the third pull, the legs and hips must remain locked out as the arms pull the bar above your head.
The muscle snatch is a great way to build raw strength in the snatch pattern, which can then be translated into explosive power in the traditional version.
Watch a demo video: (LINK)
Programming Your Home CrossFit Workouts
Establish Your Training Schedule
When I started doing CrossFit at home, my programming was messy. I’d go hard for days, then burn out. Now, I swear by the 3-1-2-1 schedule that Greg Glassman popularized.
Here’s how it works: 3 days on, 1 day active recovery, 2 days on, 1 day full rest. This structure keeps me consistent without overtraining, and I find that right on the day before my rest day, my body and nervous system are screaming at me to take a break.
If it works better for your schedule, then a 5-day on, 2-day off schedule can work, but just be aware that towards the end of the week, your motivation and performance may drop as you accumulate fatigue.
If this is the case, then consider making our fourth day an active recovery day and the final day less intensive from a volume and load standpoint.
Balancing Your Training
Concurrent training – working on strength, skills, and conditioning simultaneously – is the heart of CrossFit. But it’s tricky to get right. I learned the hard way that you can’t go 100% on everything every day.
A general overview of how to do concurrent training right is to never have the most fatiguing work before your strength training or aerobic training.
For example, if you were performing high-intensity interval training today but you also have heavy walking lunges or advanced gymnastic movements scheduled, the interval training should be last for the day.
This will minimize any interference that the higher-intensity work will have on movements that require skill, precision, and high-force production.
On active recovery days, I’ll do some light jogging, mobility work, or practice a skill I struggle with. Y
ou could also design lower-intensity bodyweight WODs to get your blood pumping and your joints moving.
Final Thoughts On The Essential Home CrossFit Movements
This article has been an in-depth look at the nine foundational movements of CrossFit, tailored for home workouts and various variations you can use to progress over time.
These exercises form the basis for creating challenging and effective Workouts of the Day (WODs) that engage the entire body, regardless of your available space or equipment.
CrossFit’s fitness philosophy centers on functional fitness and being ready for anything. While mastering these movements may take time, each repetition brings you closer to becoming the fittest version of yourself.
The versatility of these exercises allows for endless combinations, whether you’re using bodyweight, dumbbells, or barbells.
With these movements and just a few pieces of equipment and some open space, you can design an effective CrossFit workout experience, the intensity and effectiveness of CrossFit training in the comfort of your own home.
Remember that CrossFit is a journey, not an endpoint. Even after twelve years of using the methodology, I am still refining my fitness.
As you consistently incorporate these movements into your routine, you’ll likely notice significant improvements in your overall fitness level, strength, and endurance.
Whether your aim is to set new personal records or to improve your general well-being, these foundational movements provide a solid framework for achieving your fitness goals.
If you found this post helpful, consider subscribing to the free Bulletproof Training Program Newsletter to elevate your performance entirely for free.
As a newsletter subscriber, you’ll get free weekly training that can be done in your garage or in the gym, as well as deep dives on training concepts like this, designed to help you train smarter and reach your goals faster.
Stay informed, stay motivated, and keep pushing your limits with expert insights delivered right to your inbox.
Subscribe free here (LINK)